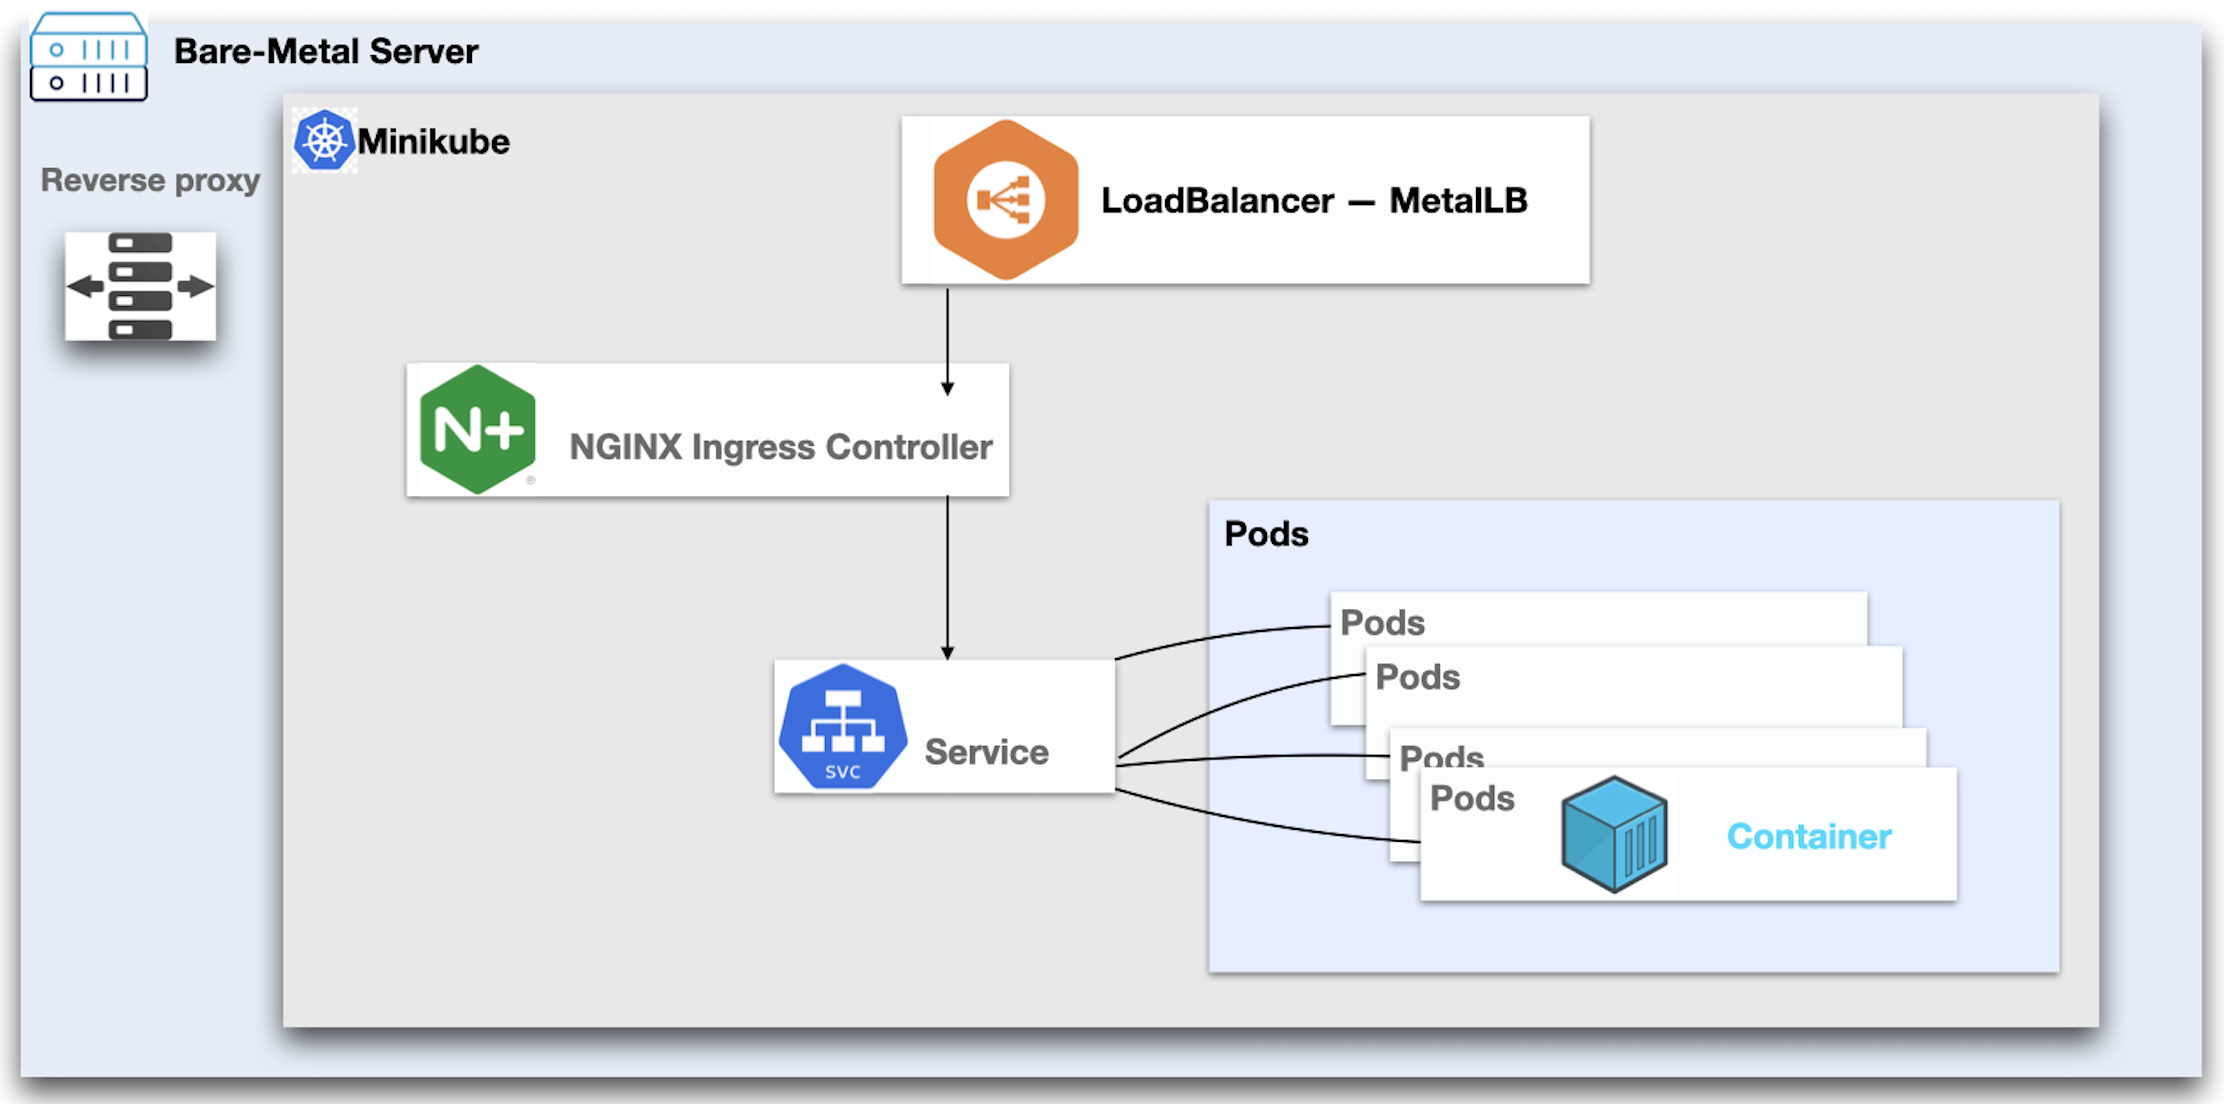
What motivated me to write, is the fact that regardless of so much material on Kubernetes, I didn’t find a simple example to ingress into a Kubernetes Cluster on a Bare-metal machine with real traffic.
Prerequisites
We used the below resources to complete this example:
- A machine with decent specs, I have used an Intel i7 HP Desktop machine with 16 GB RAM and 150 GB hard-drive.
- having Ubuntu 22.04, with apache 2.4 installed
- also installed minikube version: v1.29.0
- my machine dials to a local service provider to get a static IP assigned
- also install virtualbox so that we can use ir as minikube driver
A simple reverse proxy will do
At a highlevel we can break the efforts required into:
- Setup minikube - Setup the minikube cluster to with appropriate Pods and Services
- Writing reverse proxy rules - Writing rules for Reverse Proxy (using Apache) to direct all the traffic to the minikube cluster.
Option 1. Setting up Pods and Services
Rather than writing Pods and Service Configuration we will use few commands to avoid any mistakes as you follow.
Let’s start by starting minikube with VirtualBox drivers:
The below command starts minikube with VirtualBox drivers
1
$ minikube start --driver=virtualbox
check what ip is assigned to minikube in our case its 192.168.59.100
1
2
$ minikube ip
192.168.59.100
Lets create an Nginx pod
1
$ kubectl run nginx —image=nginx —port=80
Before creating a service with the loadbalancer type we have to install Metallb. Metallb is available on minikube but disabled by default.
1
2
3
4
$ kubectl addons list
...............

metallb                     | minikube | disabled   | third-party (metallb)          |
lets enable metallb on minikube
1
2
3
4
5
$ minikube addons enable metallb
    ▪ Using image metallb/controller:v0.9.6
    ▪ Using image metallb/speaker:v0.9.6
🌟  The 'metallb' addon is enabled
lets verify
1
| metallb                     | minikube | enabled ✅   | 3rd party (MetalLB)            |
We need to configure metallb and give it a range that includes the minikube ip i.e. 192.168.59.100
1
2
3
4
5
6
$ minikube addons configure metallb
-- Enter Load Balancer Start IP: 192.168.59.110
-- Enter Load Balancer End IP: 192.168.59.120
    ▪ Using image metallb/speaker:v0.9.6
    ▪ Using image metallb/controller:v0.9.6
✅  metallb was successfully configured
if you wish to verify it later use the following command
1
2
3
4
5
6
7
8
9
10
11
12
13
14
15
16
17
18
19
20
21
22
$ kubectl describe configmap config -n metallb-system
Name:         config
Namespace:    metallb-system
Labels:       <none>
Annotations:  <none>

Data
====
config:
----
address-pools:
- name: default
  protocol: layer2
  addresses:
  - 192.168.59.110-192.168.59.120


BinaryData
====

Events:  <none>
To finish the setup lets create the service object with the below command
1
$ kubectl expose pod nginx --port=80 --type=LoadBalancer
Option 2. Writing reverse Proxy Rules
This may already be in your knowledge but we will provide what worked for us.
1
2
3
4
5
6
7
8
9
  $ sudo vim /etc/apache2/sites-enabled/000-default.conf
  ...........

  ProxyRequests Off
  ProxyPreserveHost On
  ProxyVia Full

  ProxyPass / http://192.168.59.110/
  ProxyPassReverse / http://192.168.59.110/
You can now reach your minikube server with real internet traffic by pointing it to your server’s ip address. You will see Nginx home page from the installed pod.

